Common mistakes, pro-level tips, and everything Baltimore County drivers need to know before grabbing a wax applicator.
A fresh coat of wax is one of the most satisfying things you can do for your vehicle's finish — that deep, wet-looking shine and silky-smooth feel is hard to beat. But waxing a car isn't as forgiving as it looks. Done right, it protects your paint from UV rays, road grime, moisture, and environmental fallout. Done wrong, it can leave streaks, trap contaminants, and actually damage the finish you were trying to protect.
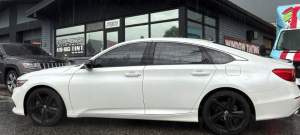
At Ideal Image Auto Salon on Belair Road in Nottingham, we see the results of both ends of the spectrum. Whether you're a first-timer or a weekend detailer who's picked up a few bad habits along the way, this guide breaks down the essential do's and don'ts of car waxing — so you get the finish right, every time.
The Do's: Best Practices for Waxing Your Car
✓ Do These ThingsDo Wash and Dry Thoroughly Before You Start
Wax seals whatever is on your paint — and that includes dirt, dust, and brake dust particles. Even a light layer of grime trapped under wax can scratch your clear coat every time you apply and buff. Give your car a thorough two-bucket wash, rinse completely, and dry with a clean microfiber towel before any wax touches the surface. For added prep, a clay bar treatment will pull embedded contaminants that washing alone can't remove.
Do Work in a Shaded, Cool Area
This is the single most important environmental rule for waxing. Maryland summers — especially around the I-695 corridor and Harford County — bring intense afternoon heat. Applying wax to a hot panel or in direct sunlight causes it to haze too quickly, making even buffing nearly impossible and leaving behind white residue in crevices. Work in a garage, under a carport, or in open shade. Early morning or late evening are ideal conditions outdoors.
Do Apply Thin, Even Coats
More wax is not more protection. Thick applications are harder to remove, more prone to streaking, and won't bond any better than a thin coat. Apply wax in a thin, uniform layer using a foam or microfiber applicator pad, working in straight overlapping strokes one panel at a time. Once you've covered a section, allow it to haze lightly before buffing — then move to the next panel. Less product, more even coverage, better result.
Do Use the Right Applicator and Buffing Towel
Always apply with a clean, soft foam or microfiber applicator pad. Buff off with a dedicated microfiber buffing towel — not a bath towel, old T-shirt, or shop rag. Coarser materials can leave light swirl marks or micro-scratches in your clear coat that are visible in direct sunlight. Use separate towels for application and removal, and wash your applicator pads regularly to prevent dry wax buildup that turns abrasive over time.
Do Allow Proper Cure Time
Follow the manufacturer's recommended cure time — typically 3–5 minutes for most paste and liquid waxes — before buffing. Removing wax too early prevents proper bonding. Waiting too long (especially in warm weather) makes it harder to buff and increases the chance of cloudy residue. When the wax looks dull or hazy and a clean finger dragged across the surface leaves a clear streak with no smearing, you're ready to buff.
Do Address Paint Correction Before Waxing
Wax is a protectant — it's not a fixer. If your paint has swirl marks, fine scratches, water spot etching, or oxidation, wax will temporarily hide them, not correct them. For lasting results, have a paint correction performed first to restore a smooth, uniform surface. Once the paint is clean and corrected, wax locks in that look. Skipping this step means sealing imperfections in place.
The Don'ts: Mistakes That Can Damage Your Finish
✗ Avoid These MistakesDon't Wax in Direct Sunlight or on Hot Paint
This is the most common mistake we see, especially during Baltimore County summers. Heat accelerates wax evaporation — it hazes almost instantly, before you've had a chance to work it evenly. You'll end up with streaks, residue baked into trim gaps, and an inconsistent finish. If the hood feels warm to the touch, the paint is too hot to wax. Move into the shade, wait 15–20 minutes, and then proceed.
Don't Apply Wax to a Wet or Damp Surface
Water and wax don't bond. Waxing over moisture — even residual dampness in panel gaps or around mirrors — will prevent the product from adhering properly and leave cloudy, uneven patches. After washing, take the time to thoroughly dry your vehicle with a clean microfiber drying towel, and use a compressed air nozzle or leaf blower to chase water out of door jambs and trim channels before you start.
Don't Wax Over Plastic Trim and Rubber Seals
Traditional car wax — especially carnauba — will leave a chalky white residue on unpainted plastic trim, rubber door seals, and moldings that's difficult to remove once dried. Before you wax, apply automotive masking tape or trim protector to all plastic and rubber surfaces. If you do get wax on trim, tackle it quickly with a plastic trim restorer and a soft brush before it dries completely.
Don't Use a Dirty Applicator
A wax applicator pad that hasn't been cleaned after its last use will have dried, hardened wax residue on it. That residue becomes abrasive — essentially dragging grit across your paint. Always inspect your applicator before use. If it has visible buildup, wash it thoroughly or replace it. A clean pad distributes product evenly and smoothly, while a contaminated one can introduce micro-scratches that take a polish to correct.
Don't Use Household Cleaners or Wrong Products
Dish soap, furniture polish, and all-purpose household cleaners are not safe for automotive paint. Dish soap in particular strips wax aggressively — it's sometimes used intentionally to prep for paint correction, which tells you everything you need to know about using it casually. Stick to products designed specifically for automotive use: pH-balanced car shampoo for washing, automotive wax or sealant for protection, and dedicated detailing sprays for maintenance.
Don't Expect Wax to Fix Scratches or Deep Oxidation
Wax creates a thin protective layer on top of your paint — it doesn't penetrate or repair. Swirl marks, deep scratches, bird dropping etching, and heavy oxidation require a mechanical correction process (polish and compound) before protection makes sense. Applying wax over heavily oxidized paint will make it look slightly better temporarily, but won't restore clarity or longevity. The fix is a proper paint correction, then wax on top.
Choosing the Right Wax for Your Vehicle
Not all waxes are created equal. The type you choose affects how easy it is to apply, how long it lasts, and what kind of finish it produces. Here's a quick breakdown of the three most common options:
| Wax Type | Best For | Durability | Ease of Use | Finish |
|---|---|---|---|---|
| Carnauba (Paste or Liquid) | Show cars, warm-colored paint | 4–8 Weeks | Moderate | Deep, warm gloss |
| Synthetic Sealant | Daily drivers, year-round use | 3–6 Months | Easy | Bright, reflective clarity |
| Ceramic Spray Wax | Maintenance coat over coatings | Up to 6 Months | Very Easy | Hydrophobic, slick finish |
Many detailers layer a synthetic sealant first for long-lasting protection, then top it with a carnauba wax for depth and warmth. You get the durability of the sealant and the show-quality shine of carnauba — the best of both worlds.
Quick-Reference: Car Waxing Do's & Don'ts
✓ Always Do This
- 🧼 Wash and fully dry before applying
- 🌥️ Work in shade on cool paint
- 💧 Apply thin, even coats
- 🧽 Use clean microfiber applicators
- ⏱️ Allow proper cure time before buffing
- 🔧 Correct paint issues before waxing
✗ Never Do This
- ☀️ Wax in direct sunlight or on hot surfaces
- 💦 Apply over wet or damp paint
- ⬛ Get wax on plastic trim or rubber seals
- 🤚 Use a dirty or dried-out applicator
- 🧴 Substitute household cleaners for car products
- 🔍 Expect wax to fix scratches or oxidation
How Often Should You Wax Your Car?
The right frequency depends on the type of wax you're using, your driving habits, and how much time your vehicle spends outdoors. As a general rule:
- Traditional carnauba wax — every 4 to 8 weeks, especially if the vehicle is driven daily or parked outside along Belair Road or I-95 corridor routes.
- Synthetic paint sealant — every 3 to 6 months for most daily drivers in Baltimore County and Harford County conditions.
- Ceramic spray toppers — monthly as a maintenance layer, especially following washing.
An easy field test: pour a small amount of water on a horizontal panel. If it beads up and rolls off quickly, your wax is still working. If it sheets out flat and clings, it's time to reapply.
Maryland winters are hard on wax protection. Road salt, freeze-thaw cycles, and sand used for deicing along routes like I-695 and US-1 accelerate wax degradation significantly. Plan for a fresh application each spring once the weather warms — and consider whether a ceramic coating might offer better year-round protection for your investment.
Is Your Paint Ready for a Professional Detail?
If your paint has swirl marks, oxidation, or wax buildup from years of DIY care, a professional detail makes all the difference before your next wax. We service customers throughout Baltimore County, Harford County, and the surrounding areas.
📞 Call 410-663-8468 Book OnlineIdeal Image Auto Salon · 7901 Belair Road, Nottingham, MD
When to Skip the DIY and Call a Professional
Waxing is a reasonable DIY task for well-maintained paint in good condition. But there are situations where a professional detail produces results no amount of weekend effort will match:
- Heavy swirl marks or scratch patterns — these require machine polishing, not just wax.
- Oxidation or paint fading — especially common on older vehicles and dark-colored cars. Compound correction is needed first.
- Water spot etching — mineral deposits that have bonded into the clear coat won't respond to wax alone.
- Preparing for a major event — car shows, photographing a vehicle for sale, or simply wanting a showroom-quality result that's hard to replicate at home.
- Considering a ceramic coating upgrade — if you're tired of reapplying wax every month, a professional ceramic coating provides years of protection with far less maintenance.
At Ideal Image Auto Salon, we handle everything from single-stage paint corrections to multi-step detail packages for drivers throughout Nottingham, White Marsh, Bel Air, and surrounding communities. If your paint needs more than a wax can offer, we'll tell you honestly — and show you the options that make sense for your vehicle and your budget.
Frequently Asked Questions About Car Waxing
Traditional carnauba wax isn't recommended over a ceramic coating — it can interfere with the coating's hydrophobic properties and bonding. However, ceramic spray boosters or "ceramic toppers" are designed specifically to layer over professional coatings as a maintenance product. These enhance gloss and extend the coating's water-beading ability without degrading the underlying protection. If you're unsure, ask your detailer what's compatible with your specific coating.
Not necessarily — it comes down to application preference and paint condition. Paste waxes, especially high-quality carnauba blends, tend to offer a deeper, warmer gloss and slightly better durability. Liquid waxes are generally easier to spread evenly and remove, making them more forgiving for beginners. Spray waxes are the quickest option for light maintenance but offer the least longevity. For most daily drivers in Baltimore County, a quality synthetic liquid sealant offers the best balance of ease, durability, and protection.
The easiest test is the water bead test. After washing your car, pour a small amount of water on a horizontal panel like the hood or trunk. If water beads up tightly and rolls off freely, your wax protection is still active. If water spreads out flat and clings to the surface without beading, it's time to reapply. You may also notice the finish looks duller than usual, or that rain and debris no longer sheet off as easily as they once did.
Color itself doesn't affect wax longevity — but how visible the effects of neglect are varies by paint color. Black, dark blue, and dark red finishes show swirl marks, water spots, and dullness much more readily than silver, white, or light gray. Dark vehicles may feel like they need more frequent attention simply because every imperfection is easier to see. The wax schedule should be the same regardless of color, but the maintenance routine for dark-colored vehicles requires a bit more care and attention to detail.
Wax can temporarily fill in and mask very fine surface scratches, making them less visible in certain lighting — but it will not remove or repair them. The moment the wax wears away, those imperfections return. True scratch and swirl mark removal requires a paint correction process using machine polish and compounds to abrade away a microscopic layer of clear coat and level the surface. Once corrected, wax is applied on top to protect and seal the results. If swirl marks are your concern, a professional paint correction is the right starting point.
For most drivers in the Baltimore–Nottingham area, professional ceramic coating offers significantly better long-term value than repeated waxing. A quality coating lasts two to five years with basic maintenance, compared to the 4–8 weeks of a traditional wax. Ceramic coatings bond chemically to the clear coat rather than sitting on top, offering superior scratch resistance, UV protection, and hydrophobic performance. The upfront cost is higher, but when you factor in the time and product expense of reapplying wax six or more times a year, ceramic coating often comes out ahead — and the results speak for themselves.
Ready for a Finish That Lasts Longer Than a Few Weeks?
From one-step detail packages to professional-grade ceramic coatings, Ideal Image Auto Salon has options for every vehicle and every budget. Serving Nottingham, White Marsh, Bel Air, and all of Baltimore and Harford Counties.
📞 Call 410-663-8468 Book Online7901 Belair Road, Nottingham, MD · idealimageautosalonmd.com
This article is intended for general informational and educational purposes. Product performance and application results will vary depending on paint condition, product formulation, climate, and preparation. For vehicle-specific guidance, consult a professional detailer.