
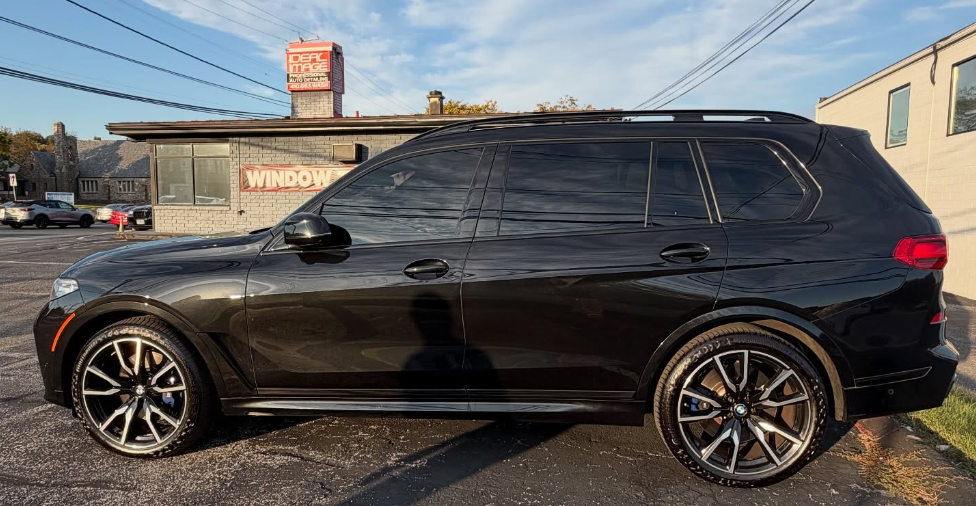
You just picked up your car from the tint shop and everything looks great. Then a couple of hours later you notice some hazy patches. Or a small bubble appears. Or you're not sure whether you can wash the car this weekend. Every driver has these questions in the first week after tint installation, and most of the answers are the same: relax, this is normal, and here's exactly what to do (and not do) for the next seven days.
What's Actually Happening Under Your New Tint
When your installer applied the film to your windows, they used a soap-and-water solution to slide the tint into perfect position, then squeegeed out the excess liquid. That process leaves a thin layer of moisture trapped between the film and the glass. Over the first several days, that moisture slowly evaporates through the film itself, and the adhesive underneath bonds to the glass. This is called curing.
Until the curing is complete, the film is not yet at full strength. The bond between the film and the glass is still forming. Rolling windows down, cleaning the interior glass, or using the wrong cleaners can disrupt this process and cause problems that a properly cured film would shrug off. This is why the first seven days matter so much.
Curing isn't drying in the everyday sense. It's a chemical bonding process. Your job in the first week is to protect that process, not accelerate it artificially.
Your Day-by-Day Guide to the First Week
Here's what to expect and what to do at each stage of the curing process. Your specific timeline may vary slightly based on film type and weather, so treat this as the standard baseline.
The Seven-Day Timeline
Windows Stay Up. Period.
The most critical 24 hours. The adhesive is at its weakest and most vulnerable to disruption. Do not roll windows down for any reason. Leave the car parked (ideally in sunlight) as much as possible, and don't touch the interior glass.
You'll See Water Spots and Haze
Small water bubbles appear as trapped moisture starts working its way through the film. Slight haziness or a soap-streak appearance is normal. Do not touch, wipe, or try to remove these. Keep windows up.
Standard Minimum Wait Ends
For most standard films in warm summer conditions, this is the earliest you can safely lower windows. For ceramic film or cooler weather, keep waiting. When in doubt, don't yet.
Bubbles Are Visibly Shrinking
The water spots and haze from day 2 are noticeably reducing in size and number. This is exactly what should be happening. The adhesive continues bonding underneath.
Most Films Are Safe to Operate
Standard films are typically cured enough at this point to lower and raise windows without risk. Ceramic film owners should still wait another day or two. Do not clean interior glass yet.
Nearly Fully Cured
Bubbles should be almost or entirely gone. Windows can be operated normally. Ceramic film is now fully bonded. Do not clean interior glass until day 10 to be safe.
Full Cure and Cleaning Safe
Film is fully bonded and stable. Interior cleaning with ammonia-free products is now safe. Enjoy your new tint.
The Six Rules for the First Week
Everything you need to know about the first seven days boils down to six simple rules. Follow these and your tint will cure into a clean, long-lasting install. Ignore them and you risk problems that a proper cure would have prevented.
1 Keep Windows Rolled Up
Minimum 48 to 72 hours for standard film. Full 5 to 7 days for ceramic. This is the single most important rule. Rolling windows down before the adhesive fully bonds can cause peeling from the edges, film shifting, or bubbles that never resolve. If you don't remember any other rule, remember this one.
2 Don't Clean Interior Glass
Wait 7 to 10 days before cleaning the inside of your windows. Cleaning too early can disturb the film during its most vulnerable phase and leave streaks or damage that won't come out. Exterior washing (including automatic car washes) is fine because tint is applied to the inside.
3 Park in Sun When Possible
Sunlight and warmth accelerate the curing process. Whenever practical, park your vehicle in direct sun during the first week. Avoid parking under trees where sap or bird droppings could land on your car during the cleaning-restricted window.
4 Only Ammonia-Free Cleaners
When cleaning becomes safe after day 10, use only ammonia-free glass cleaners. Household products like standard Windex contain ammonia that degrades tint adhesive over time. Products marked as "tint-safe" or dedicated automotive glass cleaners are the right choice for the life of your tint.
5 Soft Microfiber Only
Never use paper towels, rough cloths, or scrubbing pads on tinted windows. These can scratch the film's surface even with gentle pressure. Soft microfiber cloths (the same kind used for cleaning ceramic-coated paint) are safe and effective for tinted glass.
6 Don't Stick Anything to the Windows
Avoid parking permits, suction cups, air fresheners, or any adhesive items on the tinted glass for at least 30 days after installation. The film needs to fully bond before it can safely handle additional adhesive contact from anything else.
What's Normal (Don't Panic) vs. What's Not (Call Your Shop)
The most common source of unnecessary shop calls in the first week is drivers seeing something new about their tint and worrying it's a defect. Almost always, it's a normal part of curing. Here's how to tell the difference.
Completely Normal (Will Resolve on Its Own)
Small Water Bubbles
Tiny water spots scattered across the film, especially visible in bright light or against dark backgrounds. This is trapped moisture evaporating. Will disappear within 3 to 7 days.
Overall Haze or Cloudiness
The film may appear slightly hazy or cloudy overall during the first several days. This is completely normal and clears as the film cures. Full clarity typically returns by day 5 to 7.
Slight Purple or Blue Tint
Some films appear temporarily purple or bluish during initial curing. This is optical distortion from trapped moisture and will resolve. Not to be confused with the permanent purple fade of failing dyed film years later.
Soap Streak Appearance
Streaky patterns that look like dried soap residue are actually the remaining installation solution working through the film. These fade as curing progresses.
Cure Taking Longer in Cool Weather
If your install happened on a cool or humid day, expect curing to extend beyond the standard 3 to 7 days, sometimes up to 2 to 3 weeks. This is normal weather-related variation, not a defect.
Water Bubbles Changing Position
Small bubbles that move or shift position slightly as the film cures are normal. They're gradually working their way out through the film's surface.
Not Normal (Report to Your Installer)
Large Stationary Bubbles
Bubbles significantly larger than water spots that don't shrink or resolve after 2 weeks. These may indicate air trapped during installation rather than curing moisture.
Visible Edge Lifting or Peeling
The film physically separating from the glass at any edge. This indicates the film either wasn't properly trimmed or was disturbed before curing. Bring it back for inspection.
Visible Scratches on the Film
Scratches on the film surface (usually caused by contact after installation). Small scratches may not be repairable without film replacement in that section.
Persistent Haze After 2 Weeks
If overall haziness or cloudiness hasn't cleared after 14 days, contact your installer. This may indicate a contamination issue or improper cure environment.
Debris Trapped Under Film
Visible dust, hair, or other debris under the film indicates contamination during installation. A quality shop will inspect and address these under warranty.
Streaking or Discoloration
Uneven color or streak-like discoloration that doesn't resolve with curing may indicate film damage. Bring it in to your installer for evaluation.
A quality tint shop expects and welcomes questions in the first week. If you're unsure whether something you're seeing is normal, call. It's much better to ask early than to worry silently or (worse) try to fix something yourself.
Cure Times by Film Type
Different films cure at different rates based on their thickness and material composition. Here's what to expect from the three main film categories.
| Film Type | Typical Cure Time | Windows Up Minimum | Clean Interior After |
|---|---|---|---|
| Dyed Film | 2 to 5 days | 48 hours | 7 days |
| Carbon Film | 3 to 5 days | 72 hours | 7 to 10 days |
| Ceramic Film | 5 to 7 days | 5 to 7 days | 10 days |
| Cold/Humid Conditions | Up to 3 weeks | 7 to 14 days | 14 to 21 days |
Ceramic film takes longer to cure than other films because its thicker construction and more complex layering traps more moisture during installation. That moisture takes longer to evaporate through the film. This isn't a downside of ceramic. It's just the trade-off for the additional heat rejection and UV protection performance ceramic delivers. For a deeper look at how the different film types compare, our guide on ceramic vs. carbon vs. dyed window tint covers the trade-offs.
A tint installed on a hot July afternoon cures dramatically faster than one installed on a chilly November morning. Baltimore's shoulder seasons (spring and fall) generally offer the best cure conditions, while summer heat accelerates curing and winter cold slows it. Your installer will give you a specific timeline based on when you had the work done.
Long-Term Care After the First Week
Once your tint is fully cured, ongoing care is straightforward. A few habits keep tinted windows looking sharp for the full lifespan of quality film.
Ammonia-free cleaners forever. This isn't just a first-week rule. For the life of your tint, always use ammonia-free glass cleaners on the interior. This alone prevents most tint failures over time.
Soft microfiber only. Same principle as ceramic-coated paint. Paper towels, cotton rags, and rough cloths cause micro-scratches on film that accumulate into visible haze over years.
Avoid extreme temperature contrasts. Blasting the defroster or AC directly at cold windows on hot days (or vice versa) creates thermal stress on tint. Modest temperature changes are fine.
Be careful with seatbelts and rear cargo. Retractable seatbelts snapping back against tinted door glass can cause visible marks over time. Cargo shifting in the rear can scratch rear window tint. A quick habit adjustment protects the film.
Address chips or damage promptly. If a rock chips your window and cracks the film in that spot, get it inspected. Small damage can spread if left unattended and may require partial film replacement.
If you notice a defect, edge lift, or damage in your new tint, do not try to press it back down, cut around it, or apply anything to fix it yourself. DIY attempts almost always make the problem worse and can void your installer's warranty.
Contact your installer instead. A quality shop will inspect the tint and address any legitimate issues under warranty.
Baltimore County Considerations
A few Maryland-specific factors are worth knowing during and after the curing period.
Summer installs cure fastest. July and August installations often reach full cure in 3 to 5 days thanks to sustained heat and sun. Fall installations take a bit longer. Winter installations can extend well past 2 weeks, which is one of the reasons we recommend booking tint work during warmer months when possible.
Highway driving during cure is fine. Your commute on I-695, I-95, or US-1 during the curing period doesn't hurt the tint. The important restrictions are rolling windows down and cleaning the interior glass. External conditions like wind, weather, and highway speeds don't affect the cure process.
Automatic car washes are fine. Exterior washing including touchless and even brush car washes doesn't affect interior-applied tint. Just avoid pressure washing directly at window edges for the first week.
Maryland tint law timing. Enforcement of tint compliance happens based on the film that's installed, not the cure state. If you have concerns about whether your installed tint is compliant with Maryland law, our guide on Maryland window tint laws covers the details.
Questions About Your Tint's Cure? Call Us.
Every Ideal Image install comes with clear aftercare guidance and a warranty. If anything about your tint concerns you in the first week or beyond, we want to hear about it. Our shop in Nottingham is happy to inspect any concern, answer questions, and stand behind our work.
Call 410-663-8468Serving Baltimore County and Harford County
Frequently Asked Questions
Wait at least 48 to 72 hours before rolling down your tinted windows, and ideally 5 to 7 days for ceramic film. The adhesive under the film needs time to bond fully to the glass, and rolling windows down too early can cause the film to peel from the edges, shift, or develop bubbles that don't resolve.
If you have ceramic tint or installation happened in cool or humid weather, wait the full week to be safe. When in doubt, ask your installer for a specific timeline based on your film and installation conditions.
Small water bubbles and slight haziness in the first week after installation are completely normal and expected. This is trapped moisture from the installation process that gradually evaporates through the film as it cures. These bubbles typically clear up within 3 to 7 days.
What is not normal is large stationary bubbles, bubbles that grow or spread, obvious peeling at edges, or bubbles that don't fade after 2 weeks. Any of those should be reported to your installer for inspection.
You can wash the exterior of your car anytime after tinting because window tint is applied to the inside of the glass. Avoid pressure washing directly at the window edges for the first week. Do not clean the inside of your windows for 7 to 10 days after installation to give the film time to fully bond.
When you do clean the inside, use ammonia-free cleaners and soft microfiber cloths only. Ammonia-based glass cleaners like Windex can damage the film's adhesive and cause discoloration over time.
Park your vehicle in direct sunlight when possible during the curing period. Sunlight and warmth accelerate the evaporation process that lets the adhesive bond to the glass. Avoid parking under trees where sap or debris could fall on cleaning-restricted windows.
Keep windows rolled up completely for the recommended waiting period. In cold or humid weather, cure time may extend to 2 or 3 weeks. There's no way to fully rush the process, but avoiding shade and cold conditions helps.
A slight purple or hazy appearance in the first several days is a completely normal part of the curing process, especially on darker films. As trapped moisture evaporates through the film, the appearance temporarily shifts before settling into the film's final look. This should clear up within 3 to 7 days.
If your tint still looks noticeably purple after 2 weeks, contact your installer. A different issue is film that turns purple months or years after installation, which indicates the film itself is failing (typically dyed film, not ceramic or carbon).
Use ammonia-free glass cleaners specifically formulated for tinted windows. Common brands include Invisible Glass, Stoner Invisible Glass, and dedicated tint-safe cleaners. Apply cleaner to a soft microfiber cloth rather than spraying directly on the window to prevent liquid from reaching the film edges.
Never use household glass cleaners containing ammonia (like standard Windex), abrasive cleaners, or rough cloths. These can degrade the film's adhesive, cause discoloration, or scratch the film surface over time.
New Tint Concerns? We're Here for Warranty Follow-Up.
Every quality tint install includes ongoing support. If something about your tint doesn't seem right during the curing period or later, we want to see it. Give us a call or stop by our Nottingham shop. We serve drivers across Nottingham, White Marsh, Perry Hall, Bel Air, and the surrounding Baltimore County and Harford County areas.
Ideal Image Auto Salon
7901 Belair Road, Nottingham, MD · 410-663-8468
This article is provided for general informational purposes only. Cure times and aftercare specifications vary by film type, installation conditions, and environmental factors. Always follow the specific guidance from your installer for your particular vehicle and tint installation.