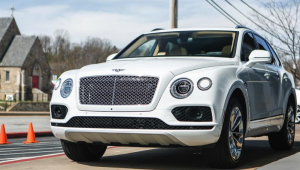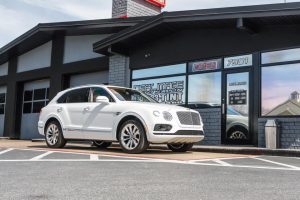
A ceramic coating is one of the smartest investments you can make in your vehicle's appearance. But the coating doesn't take care of itself. The way you wash your car after the coating is installed has a bigger impact on how long it lasts and how well it performs than almost anything else. Here's exactly how to do it right, and the common mistakes to avoid.
Why Washing a Coated Car Is Different
Ceramic coating doesn't eliminate the need to wash your car. It actually makes washing more important, not less, because the coating is doing real work every day to protect your paint from UV rays, road salt, bug splatter, and chemical contamination. Letting that protective layer get covered in dirt, brake dust, and pollen for weeks at a time means the coating can't perform the way it's supposed to.
At the same time, ceramic coating is a chemical layer measured in microns. The wrong soap, the wrong technique, or the wrong drying method can strip its hydrophobic properties or introduce swirl marks that take expensive paint correction to fix. The good news is that proper washing technique is straightforward once you know it. The bad news is that most of the habits people developed before they had a coated car are exactly the habits that will damage one.
This guide walks through everything you need to know: timing, tools, technique, and the mistakes that quietly kill ceramic coatings across the Baltimore area every week.
The First Week After Installation
If your ceramic coating was just applied, the most important rule is patience. Professional ceramic coatings need approximately 7 days to fully cure and bond to your clear coat. During that first week, the coating is vulnerable to anything that touches or contaminates the surface.
That means no washing, no buffing, no applying anything else to the paint, and ideally no exposure to rain for the first 48 to 72 hours if you can manage it. If rain is unavoidable (welcome to Maryland), gently blot off standing water with a clean microfiber towel rather than letting it pool and dry on a panel. Bird droppings or sap during the first week should be cleaned off as soon as you spot them, using a clean microfiber and a gentle quick-detailer spray, with no scrubbing.
Wait a full 7 days after professional ceramic coating installation before the first wash. The coating needs that time to fully cure. Washing too early can compromise long-term durability.
What You'll Need
The right tools make proper technique easy. The wrong tools make proper technique nearly impossible. Here's the basic kit every ceramic-coated vehicle owner should have at home.
Two Buckets
One for clean soapy water, one for rinsing your wash mitt. Five-gallon buckets work best. This is non-negotiable for swirl-free results.
Grit Guards
Plastic inserts that sit at the bottom of each bucket. They trap dirt below so it doesn't get scooped back onto your mitt.
pH-Neutral Shampoo
Specifically labeled as ceramic coating safe. Never use dish soap, household degreasers, or anything acidic on a coated surface.
Microfiber Wash Mitt
Plush, deep-pile microfiber lifts and traps dirt away from the paint. Replace it when it shows visible wear or contamination.
Plush Drying Towels
Large microfiber drying towels or a quality waffle-weave towel. Reserved exclusively for the vehicle, never used for anything else.
Optional: Air Blower or Foam Cannon
A leaf blower or dedicated car dryer eliminates water spots without contact. A foam cannon adds lubrication before contact washing.
The Step-by-Step Two-Bucket Wash
This is the technique professional detailers use and the one we recommend to every ceramic coating customer at our Nottingham shop. Follow these steps consistently and your coating will perform like new for years.
1 Park in the Shade
Wash early morning, late afternoon, or in a shaded driveway or garage. Direct sun causes soap and water to evaporate too quickly, leaving streaks and mineral deposits. Hot panels also increase the risk of swirl marks during drying. This single decision protects the rest of your work.
2 Pre-Rinse Thoroughly
Use a hose with a moderate spray pattern to rinse the entire vehicle from top to bottom. The goal is to wash away loose dirt, dust, and surface debris before any physical contact. If you have a foam cannon, this is when to lay down a layer of pH-neutral foam and let it dwell for a few minutes to lift contaminants.
3 Set Up Your Two Buckets
Fill bucket one with water and ceramic-safe shampoo at the dilution your soap recommends. Fill bucket two with plain water for rinsing the mitt. Drop a grit guard into the bottom of each. This setup is what separates a real wash from a swirl-machine session.
4 Wash Top to Bottom in Sections
Start at the roof and work down. Dip your mitt in the soapy bucket, then wash one section (a roof half, a door, a fender) using straight-line motions rather than circles. Straight lines are far less visible if any minor marring does occur. Keep light pressure. Let the soap do the work.
5 Rinse the Mitt Between Sections
After each section, dunk the mitt into the rinse bucket and scrub it against the grit guard to release trapped dirt. Squeeze it out, then return to the soapy bucket for the next section. This is the move that prevents swirl marks. Skipping it is the single biggest mistake on coated vehicles.
6 Handle Wheels Separately
Wheels collect brake dust, road grime, and embedded iron particles that you absolutely do not want on your paint mitt. Use a dedicated wheel mitt or brush and a separate bucket if possible. Always do the wheels either first (then refresh your buckets) or last with separate tools.
7 Final Rinse
Once the entire vehicle is washed, rinse it thoroughly from top to bottom. Make sure no soap residue is left on any panel, including around trim, mirrors, and badges. Lingering soap dries into spots and streaks, especially on hot surfaces.
8 Dry Immediately
Don't let water sit and air-dry. Even on a coated car, hard water minerals can etch the surface as droplets evaporate. Use a large plush microfiber towel to blot and gently drag, or use an air blower to push water off without contact. Work top to bottom.
Drying Methods Compared
Drying is where a lot of careful washing gets undone. Here's how the main drying methods stack up for a ceramic-coated vehicle.
| Method | Best For | Risk Level | Notes |
|---|---|---|---|
| Air Blower | Coated vehicles, badge and seam areas | Very Low | Zero physical contact. A standard leaf blower works. Best option overall. |
| Plush Microfiber Towel | Most home washes | Low | Blot or gentle drag, never scrub. Keep multiple clean towels on hand. |
| Waffle Weave Towel | Large flat panels (roof, hood) | Low | Highly absorbent. Pair with a separate plush towel for trim and details. |
| Chamois or Synthetic Shammy | Not recommended for coated cars | High | Can drag grit across paint. Generally avoid on a coated vehicle. |
| Regular Bath Towel | Never on a coated car | Very High | Cotton fibers cause micro-scratches and pull at the coating surface. |
| Air Drying | Never on a coated car | High | Hard water minerals etch as droplets evaporate, even on hydrophobic surfaces. |
How Often Should You Wash?
The right frequency depends on how your vehicle is used and where it's parked. Here's a quick reference for the Baltimore area.
Heavy use: daily I-695 or I-95 commute, lots of pollen, salt season, parking under trees.
Typical use: standard commuting, mixed parking, normal Maryland weather. This is the sweet spot.
Light use: low miles, garaged most days, mild weather. Don't go longer than this without a wash.
Going more than three weeks between washes is the most common reason coated vehicles start losing their hydrophobic edge prematurely. Contaminants bond to the surface, micro-deposits build up, and eventually the coating has to work through a layer of grime to do its job.
What to Avoid on a Coated Vehicle
These are the habits that quietly degrade ceramic coatings and the ones we see causing problems most often in customer vehicles.
Automatic Brush Car Washes
The brushes are contaminated with grit from every car that came before yours. They press against paint with enough force to leave swirl marks regardless of what's coating it. Touchless is safer, but hand washing is far better.
Dish Soap or Household Cleaners
Dish soap is alkaline and designed to strip oils and waxes. Used regularly on a coated car, it shortens the coating's life. Stick to ceramic-safe, pH-neutral car shampoo only.
Sponges and Stiff-Bristle Brushes
Cellulose sponges, gas station sponges, and stiff brushes hold and drag grit across paint. Microfiber mitts are the only safe option for the body of a coated vehicle.
Washing in Direct Sunlight
Heat causes water and soap to evaporate before you can rinse them off, leaving spots and residue. Always wash in shade, early morning, or late afternoon during Maryland's warmer months.
Single-Bucket Washing
Without a separate rinse bucket, you're just moving dirt around. Every dip back into a single bucket of dirty water loads more grit onto the mitt for the next pass. This is the leading cause of preventable swirl marks.
Letting Water Air-Dry
Hard water minerals etch into surfaces as water evaporates, even hydrophobic ones. Always dry the car right after rinsing. This is especially important on hot summer days in Nottingham and across Baltimore County.
Boosters and Quick Detailers Between Washes
A ceramic booster spray (sometimes called a topper or SiO2 detailer) is one of the easiest ways to keep your coating performing at its best between major services. These products are sprayed on a clean, dry panel after washing, then wiped down with a clean microfiber. The whole process adds about 15 minutes to a wash.
Most boosters work best when applied every 3 to 6 months. They refresh water beading, add a bit of slickness back to the surface, and provide a sacrificial layer that takes the brunt of daily wear. Your installer should be able to recommend a booster product that's compatible with the specific coating on your vehicle. Using the wrong product can sometimes interfere with the coating, so it's worth asking.
Quick detailers are a separate category: lighter products meant for spot-cleaning between washes. They're perfect for wiping away a fresh bird dropping, dust on the hood after sitting outside, or fingerprints on a door handle. Keep a bottle and a couple of clean microfiber towels in the trunk and you can handle small touch-ups without going through a full wash cycle.
Maryland-Specific Considerations
The Baltimore-Nottingham area has its own set of conditions worth planning around if you want to keep your coating performing at its best year-round.
Winter and road salt. Maryland's winter brine is aggressive. After any snow event or trip on a recently treated road, a wash within a day or two is ideal. The coating handles salt well, but letting it sit accelerates wear on lower panels, wheel wells, and behind the wheels. A quick rinse-down is better than nothing if a full wash isn't practical.
Pollen season. Spring brings heavy pollen across Baltimore County and Harford County. Coated cars rinse cleaner than uncoated, but pollen still benefits from prompt washing because it can hold moisture against the coating surface and become harder to remove the longer it sits.
Summer heat. July and August afternoons routinely hit temperatures where panels become hot to the touch. Always wash in shade or in the cooler parts of the day. A garage works perfectly if you have one available.
Tree parking. If you live or work in tree-heavy areas like Perry Hall, White Marsh, or parts of Bel Air, sap and bird droppings are going to be an ongoing reality. Spot-clean as soon as you notice them with a quick detailer and microfiber. The coating gives you a wider window to react, but it doesn't make timing irrelevant.
A coated car gets dirty just like any other car. The difference is that dirt releases more easily, water carries it away faster, and a proper wash takes noticeably less time and effort once you have the technique down.
Signs Your Wash Routine Is Hurting the Coating
If you've had your coating for a while and something feels off, here are the warning signs that the wash routine might be the culprit rather than the coating itself wearing out.
Water sheets instead of beads. Hydrophobic performance is the first thing to fade when a coating is being stripped. If you're using harsh soap or skipping proper care, you'll notice this within a few months rather than years.
Fine swirl marks appearing under direct sun. Almost always a sign of single-bucket washing, wrong drying technique, or automatic brush washes. The coating itself doesn't cause swirls; the technique applied to it does.
The car looks dull faster between washes. Healthy coatings stay glossy and clean longer between services. If yours is looking tired sooner than it used to, contamination is building up on the surface and a proper decontamination wash may be needed.
Water spots that don't wipe off. If hard water has been left to dry on hot panels repeatedly, mineral deposits can bond to the surface. These usually require a dedicated water spot remover or a professional touch-up to fully clear.
Need a Coating Refresh or Inspection?
If your ceramic coating isn't beading like it used to, or you'd like a professional decontamination wash and booster application, our team at Ideal Image Auto Salon offers maintenance services for coated vehicles across Baltimore County and Harford County.
Call 410-663-8468Serving Baltimore County and Harford County
Frequently Asked Questions
Every two weeks is the sweet spot for most ceramic-coated cars. Weekly washes are fine if your vehicle gets heavy exposure (lots of highway miles, parking under trees, winter road salt).
Going longer than three weeks between washes lets contaminants bond to the surface and slowly degrades the hydrophobic layer. The coating doesn't eliminate washing; it just makes each wash easier and gives you more grace time between them.
Avoid automatic brush washes entirely. The stiff brushes are contaminated with grit from previous vehicles and will leave swirl marks on coated paint just like uncoated paint.
Touchless washes are safer than brush washes, but many use harsh alkaline chemicals that can slowly degrade the coating. Hand washing with proper technique is the gold standard. If you must use a commercial wash, choose touchless and follow it with a hand rinse and dry at home.
Use a pH-neutral car wash shampoo specifically labeled as safe for ceramic coatings. pH neutral means a pH between roughly 6 and 8.
Avoid dish soap (alkaline and designed to strip wax and oils), acidic wheel cleaners on the body, and any household degreaser. These chemicals can break down the coating's hydrophobic properties and shorten its life significantly.
Yes, if you want to keep your coating looking new. The two-bucket method (one bucket of clean soapy water, one bucket of plain rinse water with grit guards) keeps the dirt you've already removed from getting back onto your mitt and dragged across the paint.
Single-bucket washing is the number one cause of swirl marks on coated vehicles. The technique adds about five minutes to your wash but makes a significant difference over time.
Wait at least 7 days before the first wash after a professional ceramic coating installation. The coating needs time to fully cure and bond with the clear coat. Washing too early can interfere with the curing process and reduce the coating's long-term durability.
If your vehicle gets rained on during that first week, gently wipe off standing water with a clean microfiber towel rather than letting it sit and dry on the surface.
A ceramic booster (also called a topper or SiO2 spray) is a maintenance product that adds a fresh layer of hydrophobic protection on top of your existing coating. They're sprayed on after washing and take about 15 minutes to apply.
Boosters are not required, but applying one every 3 to 6 months can extend your coating's effective lifespan, restore strong water beading, and add extra gloss between maintenance visits. Most professional installers can recommend a product compatible with the specific coating on your vehicle.
Questions About Your Coating?
Whether you got your coating installed with us or somewhere else, we're happy to take a look, recommend the right wash products for your specific coating, and answer any care questions you have. Drivers across Nottingham, White Marsh, Perry Hall, Bel Air, and the surrounding Baltimore County and Harford County areas are welcome to stop by or call.
Ideal Image Auto Salon
7901 Belair Road, Nottingham, MD · 410-663-8468
This article is provided for general informational purposes only. Coating performance varies based on product, application, environmental exposure, and ongoing care. Always follow the specific maintenance guidance provided by your installer or the coating manufacturer for best results.